How to Grow Microgreens at Home
Microgreens have ushered in a green revolution in our kitchens. These tiny plants appeal to those of…
This post may contain affiliate links. Please see the privacy policy for details.
Microgreens have ushered in a green revolution in our kitchens. These tiny plants appeal to those of us living in urban spaces since they require minimal room to thrive. You can cultivate them on a sunny windowsill or a small balcony. Also, microgreens can elevate the simplest dish with their fresh flavors and vibrant colors.
As a home gardener, I’ve watched microgreens grow in popularity. They are sustainable, can be grown all year round, and offer a quick turnaround from seed to salad bowl.
The ease of growing these greens aligns well with busy lifestyles, letting you harvest what you need, when you need it, reducing waste in the process. This is an effortless first step for anyone looking to begin their journey into home gardening.
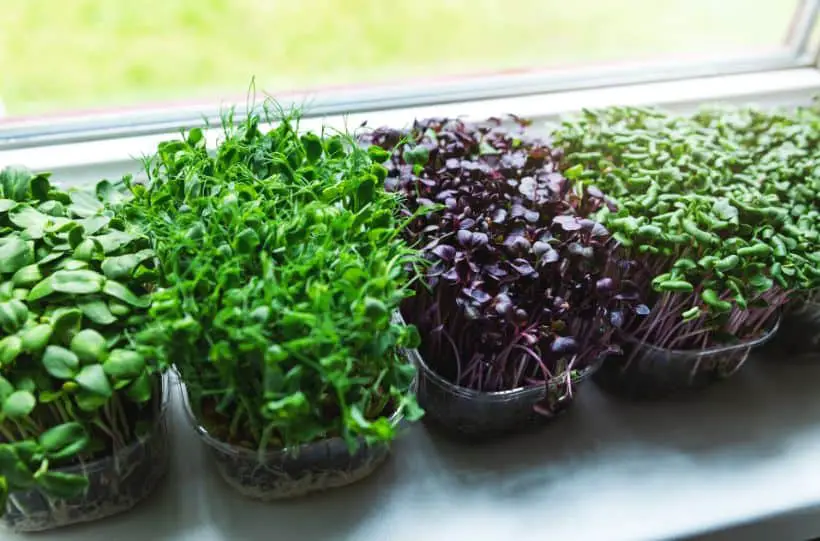
Choose Your Microgreen Variety
The world of microgreens offers an array of options that cater to various tastes and preferences. You can choose from spicy radish and mustard greens to more subtle flavors like red cabbage or beets.
Each variety brings its own unique taste and a bouquet of nutrients. For instance, radish microgreens pack a punch of spicy flavor, while sunflower microgreens offer a nutty taste.
Consider the growth rate when selecting your seeds. Some greens, such as arugula, grow quickly and can be ready to harvest in as little as five days, whereas others, like amaranth, may take a bit longer. This feature allows you to plan your harvesting schedule and enjoy a steady supply of fresh greens.
How you plan to use your microgreens should also influence your choice. If you want to add a fresh, peppery note to sandwiches, radish greens might be perfect, but delicate purple shiso could be more appropriate for a decorative salad garnish.
Don’t hesitate to experiment with different microgreen varieties. Mixing and matching will enhance your meals with a spectrum of flavors and textures and increase the diversity on your plate.
Gathering Your Supplies
Embarking on the microgreen journey begins with assembling the right tools. You’ll start with containers. Any shallow tray or pot will do, as microgreens have a short root structure. Just ensure your chosen container has drainage holes.
Next, you need a growing medium. Options include soil, coconut coir, or a soilless mix specifically designed for seed starting. This medium will support your seeds with nutrients and moisture for optimal growth.
Then, secure your seed selection. Choose from a range of microgreen varieties like radish, arugula, and basil. Pick those that align with your taste preferences and intended use. Buying high-quality, untreated seeds can significantly impact your success rate and plant health.
Natural light may suffice for many microgreens, especially if placed near a south-facing window. Otherwise, consider grow lights to provide consistent light exposure, which is crucial for robust growth and photosynthesis.
Last, think about water management. A spray bottle proves handy for gentle watering that won’t displace or flood the seeds.
By collecting these essentials, you’ll set the stage for a microgreen garden that can thrive indoors, offering fresh flavors and dense nutrients all year round.
Steps to Planting Your Microgreens
- Prepare your container: Choose a clean container with drainage holes and fill it with a pre-moistened growing medium, such as potting soil or coconut coir, leaving about half an inch of space at the top.
- Sow the seeds: Spread your microgreen seeds evenly over the surface of the medium. Since these plants will be harvested young, you don’t need to worry about overcrowding.
- Cover the seeds: Lightly press the seeds into the medium and cover them with a thin layer of soil. Some varieties need light for germination, so refer to your seed’s packaging for specific instructions.
- Moisten the surface: Gently mist the surface with water to settle the seeds. Be sure not to overwater, as soggy conditions can lead to mold or rot.
- Provide warmth: Place the container in a warm area to encourage germination. The top of the refrigerator or a heat mat can provide the perfect cozy spot for your seeds to sprout.
- Light it up: Once seeds have sprouted, move the container to a brightly lit location or use a grow light to ensure your microgreens get enough light to grow strong and healthy.
Caring for Your Growing Greens
Maintaining a healthy environment for your microgreens starts with regular watering. Keep the soil moist but not waterlogged to prevent mold growth and root rot. Use a spray bottle to gently mist the surface, particularly after seeding and during the early stages of growth.
Microgreens thrive in a stable temperature range, usually between 60-75°F (15-24°C). This warmth supports consistent growth without stressing the plants. If your home is prone to temperature fluctuations, consider placing the microgreens in an area less affected by these changes.
Lighting plays a crucial role in the process too. Provide ample light, but avoid direct sunlight that can scorch the delicate leaves. South-facing windows are often ideal for natural light, but grow lights can offer a controlled alternative, ensuring your plants get 12-16 hours of light daily.
Remember that these plants are tender and require a careful touch. Monitor growth daily and make slight adjustments as needed. Consistent care results in lush, flavorful greens ready to enhance your meals.
Maintaining these conditions will help your microgreens flourish, rewarding you with a bountiful harvest.

Harvesting and Using Your Microgreens
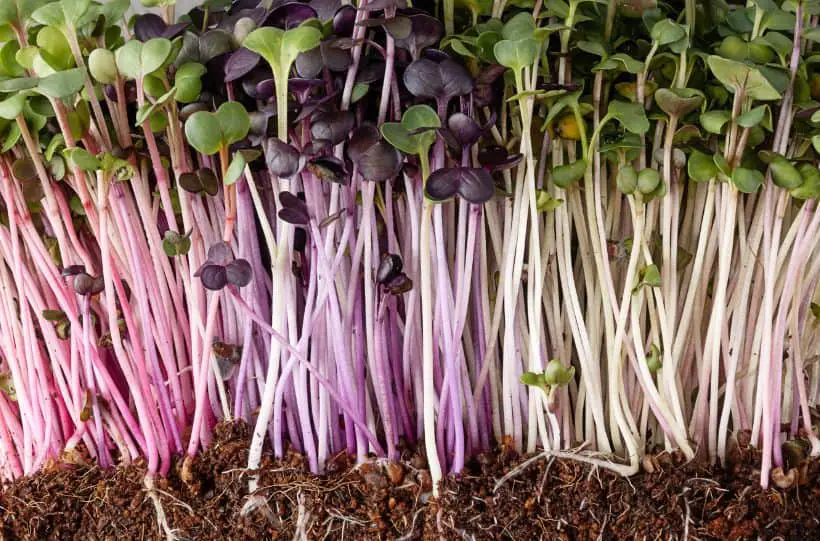
Harvest your microgreens when they’re 1-3 inches tall, and you can see the first set of true leaves. Depending on the variety, this stage typically arrives 7-14 days after planting.
Snip the greens right above the soil line using clean, sharp scissors. This method ensures you get the most flavor packed in every delicate leaf. Gather them gently in your hand, avoiding any harsh squeezing that might bruise the tender plants.
For storage, loosely pack the harvested microgreens in a paper towel and place them in an airtight container. Keep them in the refrigerator to maintain freshness. They should stay vibrant and tasty for about a week. Remember only to wash them right before you use them, as excess moisture can accelerate spoilage.
Get creative in the kitchen with your microgreens. Toss them into salads for a burst of color and a peppery kick, or drape them over a savory dish for an instant gourmet touch. Try blending them into smoothies, or use them as a fresh, vibrant garnish on soups and sandwiches.
Growing microgreens at home fills me with a unique sense of accomplishment. The joy of nurturing something from seed to plate motivates me to rise each morning and check on my little green sprouts.
Observing their transformation and knowing these greens enhance my meals with both flavor and nutrition, I feel connected to the food I eat in a way that store-bought produce seldom matches.
I relish the learning curve that comes with cultivating different varieties. There’s always a new flavor to discover, a different growth habit to understand, and the delightful challenge of perfecting the growing conditions.
Whether it’s adjusting the watering schedule, tinkering with light exposure, or experimenting with soil mixes, each adjustment teaches me more about these fascinating plants.
My kitchen garden has become a conversation starter and a source of pride. I find myself eager to share tips with friends and swap microgreen-infused recipes.
The act of gifting a container of lush, edible greens not only spreads joy but often inspires others to start their own gardening journey. So invite your friends over, share your harvest, and let homegrown microgreens’ fresh, vibrant taste spark new connections and creativity at your table.